Jordan Huffer is a junior photojournalism major and writes ‘Born in a Ball Jar’ for The Daily News. Her views do not necessarily agree with those of the newspaper or The Daily. Write to Jordan at jahuffer@bsu.edu.
|
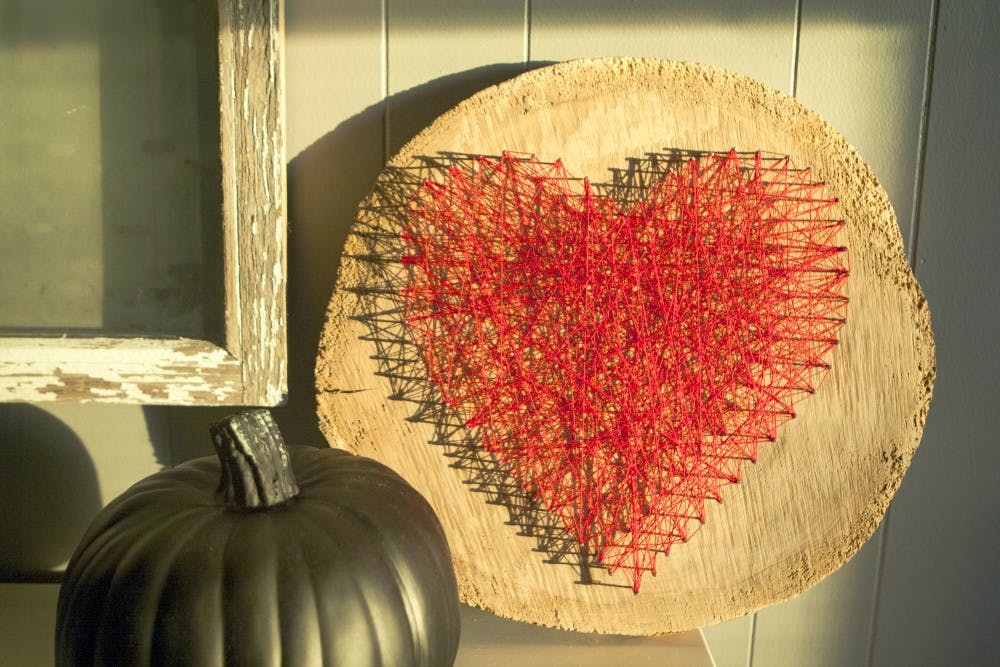
One of the best parts of crafting is the ability to make one of a kind objects to suit any decor. String Art is a classic example of this. With very little money and time you can make art that you can display with pride. The one that we made here was only $4. |
|||||
Materials: |
Piece of wood | A shape to trace | String (any color or thickness) | Hammer | |
| Nails | Super glue | Scissors | Carbon paper (optional) | ||
|
1 You can use any kind of wood surface to make your art. A plank from an old barn, a plaque from the craft store or in our case, a tree cookie gotten at a local fair. With this we just sanded it down to get a smooth finish. You might want to paint or stain your wood as well. I would advise you to just make sure it's got at least a half inch in depth. [You don't have to use a piece of wood though. Make a large scale string art by working directly on a wall.] 2 Trace your design. You can make any kind of design that you like on this, but I would try and keep it kind of simple. We did a heart, but basic shapes and letters would also work. We taped it down and marked spots where the nails would go. You can also use carbon paper to trace something that is a bit more intricate, then mark the sports for the nails. 3 Get to hammering. We used inch and a half nails for this, but make sure that they were all sticking out of the wood at the same height. You should have a nail every quarter inch. 4 Take one end of your string and tie it off at the one end, making sure that it's a strong knot. We moved the knot down a little on the nail so we had room to work. 5 Start stringing. Take this slow and try to hit every nail as many times as possible. You want to make sure there are as few empty spaces as possible to make it look full. I used an entire spool of thread for this, tying the thread off every once in a while. 6 Push the thread up to the top of the nail. This gave the project depth and allows the strings to cast some pretty cool shadows. I put a small drop of super glue on each nail to secure the strings. |
|||||
Read More

ICC: ‘Good trouble’: Hoosiers rally against Trump, honor late US Rep. John Lewis
By Indiana Capital Chronicle / 16 hours agoHundreds of people rallied outside the Indiana Statehouse on Thursday to protest President Donald Trump and pay tribute to U.S. Rep. John Lewis of Georgia.

PHOTOS: The 173rd Delaware County Fair
YesterdayThe 173rd Delaware County Fair is in full swing, bringing a week of rides, food, and hometown tradition to the Delaware County Fairgrounds.

IPR: Indiana will no longer move forward with its plan to reduce greenhouse gas emissions
By Indiana Public Radio / 2 days agoIndiana is no longer moving forward with its climate action plan.