
There are some holidays most Americans have begun to expect a big party attached to, including St. Patrick’s Day.
Between planning enough food and variety to please all of your guests and bringing in every chair you can find from the garage, decorations can be the last thing on your mind.
If you need a little inspiration, here are three easy construction paper crafts you can make simple or add a little flare without pushing your already bulging budget.
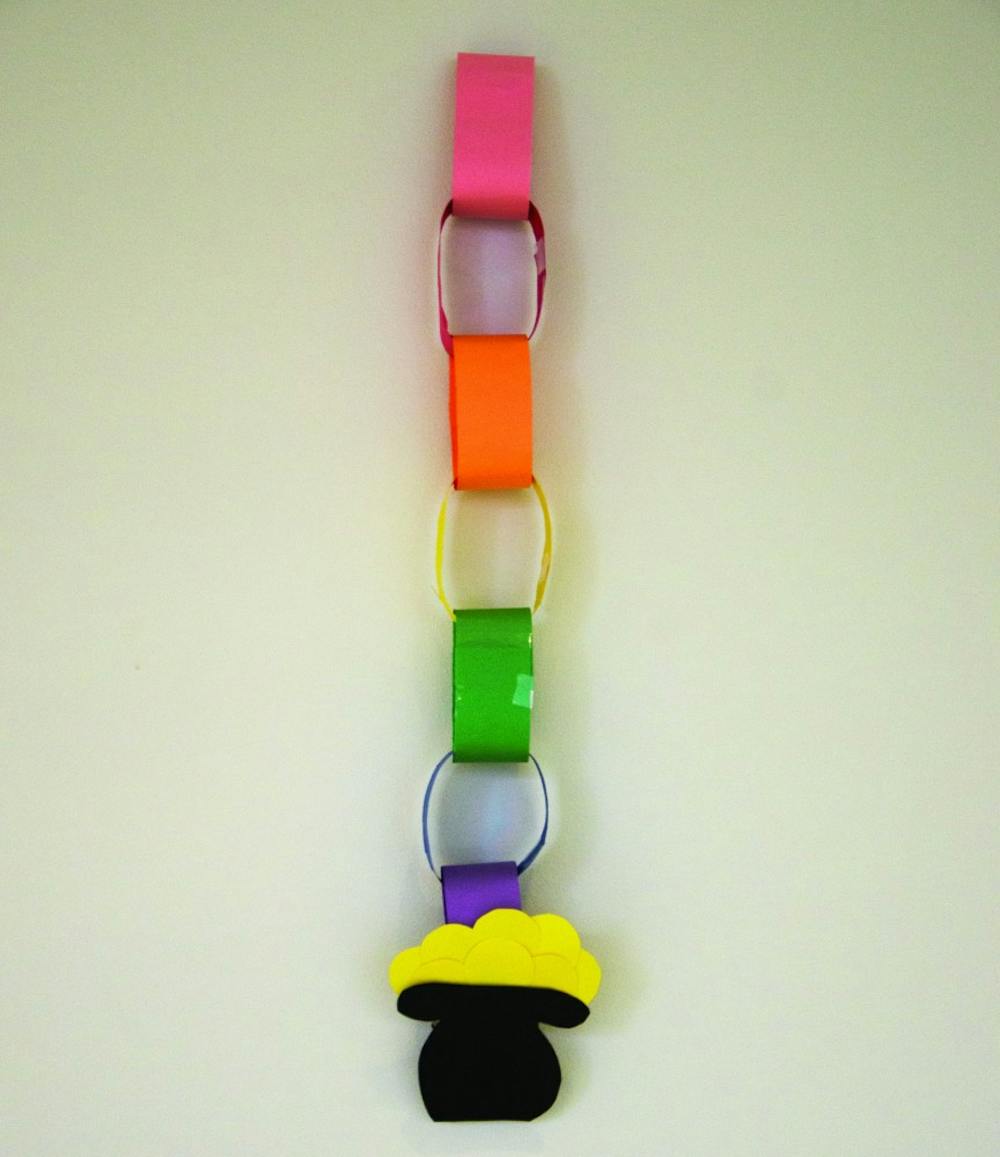
Hanging Pot o' Gold
What you need:
- Construction paper: pink, red, orange, yellow, green, blue, purple and black
- Gold glitter (optional)
- Scissors
- Tape or stapler
- Ruler
- A circle shape about 1 inch in diameter
Directions:
- Lay the pink sheet of construction paper on the table vertically.
- Measure out an inch from the side edge of the paper on both the top and the bottom.
- Line the ruler up with the two lines you drew and connect them with another line down the page.
- Cut out the long strip.
- Repeat steps 1-4 with the red, orange, yellow, green, blue, purple and black construction paper sheets.
- Starting with the pink strip, bend it into a circle to make the first link of the chain. Use tape or a staple to hold the ends of the strip together.
- Take the red strip and put one end of it through the center of the pink circle. Bend it to make another circle, while it is still linked to the pink circle. Tape or staple the end.
- Repeat step 7 by placing the next strip through the circle you just made. Put the colors in the following order: orange, yellow, green, blue, purple and black.
- Set your completed chain aside and get the rest of the black construction paper you used to make the strip. Using a pencil, draw out the shape of your pot which will hold the gold.
- Cut out your pot.
- Using the leftover yellow construction paper, trace around your circular object eight times to make the gold.
- Cut out the yellow circles.
- Tape or staple the yellow circles to the back of your pot in an even layer. (Or however you think looks the best for your pot o gold.)
- Tape or staple the pot to the black strip on your chain. (Make sure it is facing forward.)
- Hang the decoration from the door or a table.
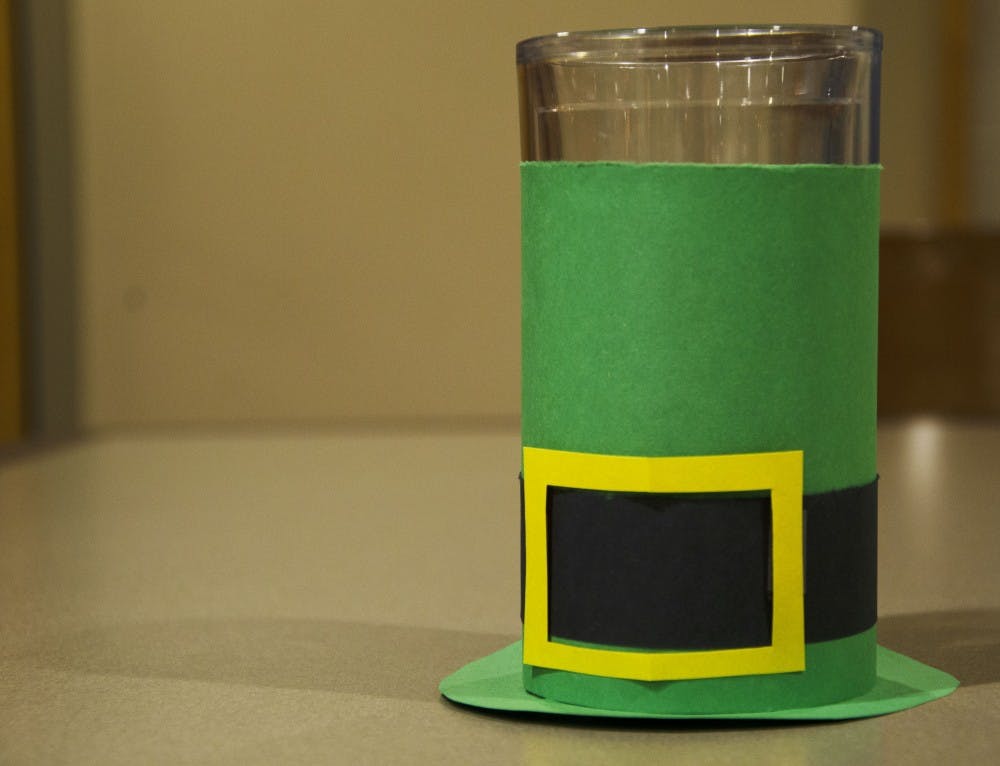
Leprechaun Hat Cup Covers
What you need:
- Construction paper: green, black and yellow
- Tape or stapler
- Glue
- Scissors
- Ruler
Directions:
- Take a sheet of green construction paper and cut it in half hot dog style (or vertically).
- Using one half of the sheet, roll the strip into a circular shape to make the middle of the hat. Tape or staple the ends together.
- Using the remaining green construction paper, set your green tube in the middle and trace a circle about an inch away from the outside of the tube. This will make the brim of the hat.
- Cut out the circle you traced.
- Fold the circle in half and cut flaps, but don’t cut too far to ruin the outside ring.
- Put the green cylinder on top of the green circle. Tape the flaps to the inside of the cylinder to hold the two pieces together.
- Set the base of the hat aside. Lay the black construction paper horizontally and measure an inch from the side edge on both the top and the bottom.
- Line your rule up with the two marks you made and draw a line between them.
- Cut out the strip you made.
- Wrap the black strip around the green cylinder an inch from the bottom. Tape into place.
- Take the yellow construction paper and measure out a 2 in by 2 in square.
- Fold the yellow square in half. Cut a square from the middle to leave a square outline to make the buckle for the hat.
- Glue the square outline in the middle of the black strip so it fits evenly over the strip.
- Place your cup into the hat and enjoy.
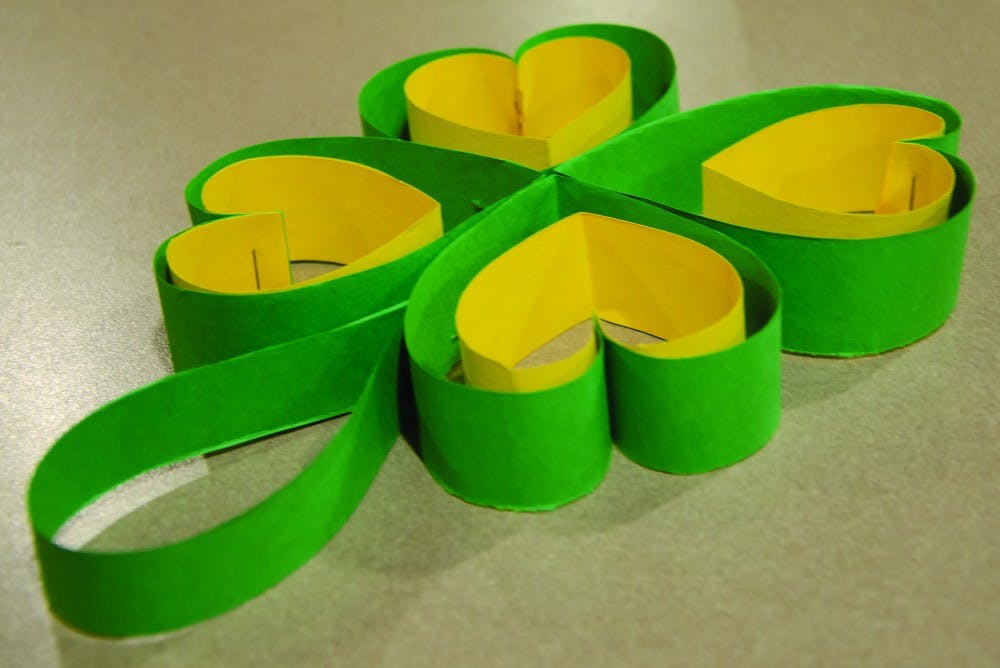
Clover Decoration:
What you need:
- Construction paper: dark and light green (or you can use green and yellow)
- Scissors
- Tape or staples
- Ruler
Directions:
- Take the dark green sheet of paper and lay it vertically on a table.
- Measure 5 inches out from the side edge of the paper on both the top and the bottom.
- Line your ruler up with both marks and draw a line between the two to connect them.
- Cut out the strip.
- Make lines on the top and bottom of the strip at every 1 inch. Use your ruler to draw lines from top to bottom and make strips.
- Cut out the strips. You should end up with five.
- Take the yellow sheet of construction paper and lay it horizontally on a table.
- Follow steps 2-6 with this sheet as well except only cut out 4 inches, but these strips should be shorter than the green ones. You will only need four of these.
- Take one green strip and bend it into the shape of a heart. Crease the bottom of the heart to make a point. Staple the two ends of the strip together to keep the shape.
- Repeat step 9 for the other three green strips.
- Take one of the yellow strips and bend it into the same heart shape as the green ones. Place it inside the larger green heart and staple the ends of the green heart to the ends of the yellow heart to attach the two together.
- Repeat step 11 with each yellow heart. You should end up with four double hearts.
- Lay the four double hearts in the shape of a clover. Staple the sides of each one to the one next to it to keep the shape.
- With the remaining green strip you cut in the beginning, loop the strip into a oblong teardrop shape. Staple the ends together.
- Place this in between two of the double hearts and staple it to the side of both to hold in place.
- Hang on a door or set on a table for decoration.
Contact Tier Morrow with comments at tkmorrow@bsu.edu or on Twitter @tiermorrow.
Read More
![A member of Open Door Health Services [ODHS] Connections Team meets with a resident and assists them with enrolling in a health insurance plan in 2024. CEO and President of ODHS Bryan Ayars said around 10%-11% of their patients they see are uninsured. ODHS, Photo provided](https://snworksceo.imgix.net/bsd/6f04939c-59ef-4f5b-930d-1ab3f45749c1.sized-1000x1000.jpg?w=1000&ar=4%3A3&fit=crop&crop=faces&facepad=3&auto=format)
Counters against low-Income healthcare barriers exist for Muncie and other Hoosiers
By Zach Gonzalez / 20 minutes agoAccording to America’s Health Rankings data, Indiana ranked 27 out of 50 in states with the most uninsured citizens in 2023, and income inequality had the largest cause in Indiana on overall health, based on a 2024 annual report on the state’s public health from the same organization.

Something for Everyone: Stitch, Resist, Slice, and Explore
By Ball State Daily / 3 hours agoLooking for local ways to meet new people, enjoy hands-on experiences, or just try something new without breaking the bank? From community crafting at The Cup to geode slicing at Kat’s Crystals, Muncie offers a full week of inclusive, engaging events. This roundup highlights free and low-cost happenings from June 15 to 21. The events include a progressive social mixer at Guardian Brewing Co., a no-questions-asked food tailgate at Callaway Park, an educational stroll through Minnetrista’s pollinator gardens, and more. Whether you want to stitch, resist, slice, or simply explore, there’s something in town for everyone.

ICC: ‘America has? No Kings!’ Hoosiers protest at Statehouse on Trump’s birthday
By Indiana Capital Chronicle / YesterdayTrump’s birthday coincided with the 250th anniversary of the U.S. Army. Both were honored with a military parade in the nation’s capital as protesters gathered across the country for “No Kings” protests.