Jordan Huffer is a junior photojournalism major and writes ‘Born in a Ball Jar’ for The Daily News. Her views do not necessarily agree with those of the newspaper or The Daily. Write to Jordan at jahuffer@bsu.edu.
What you need:
- Prints of your photo (4-7 copies)
- X-Acto knife
- Mat board or foam core
- Glue stick
- Frames (2 or 3 of the same size)
- Glue stick
- Hot glue or heavy duty craft glue
|
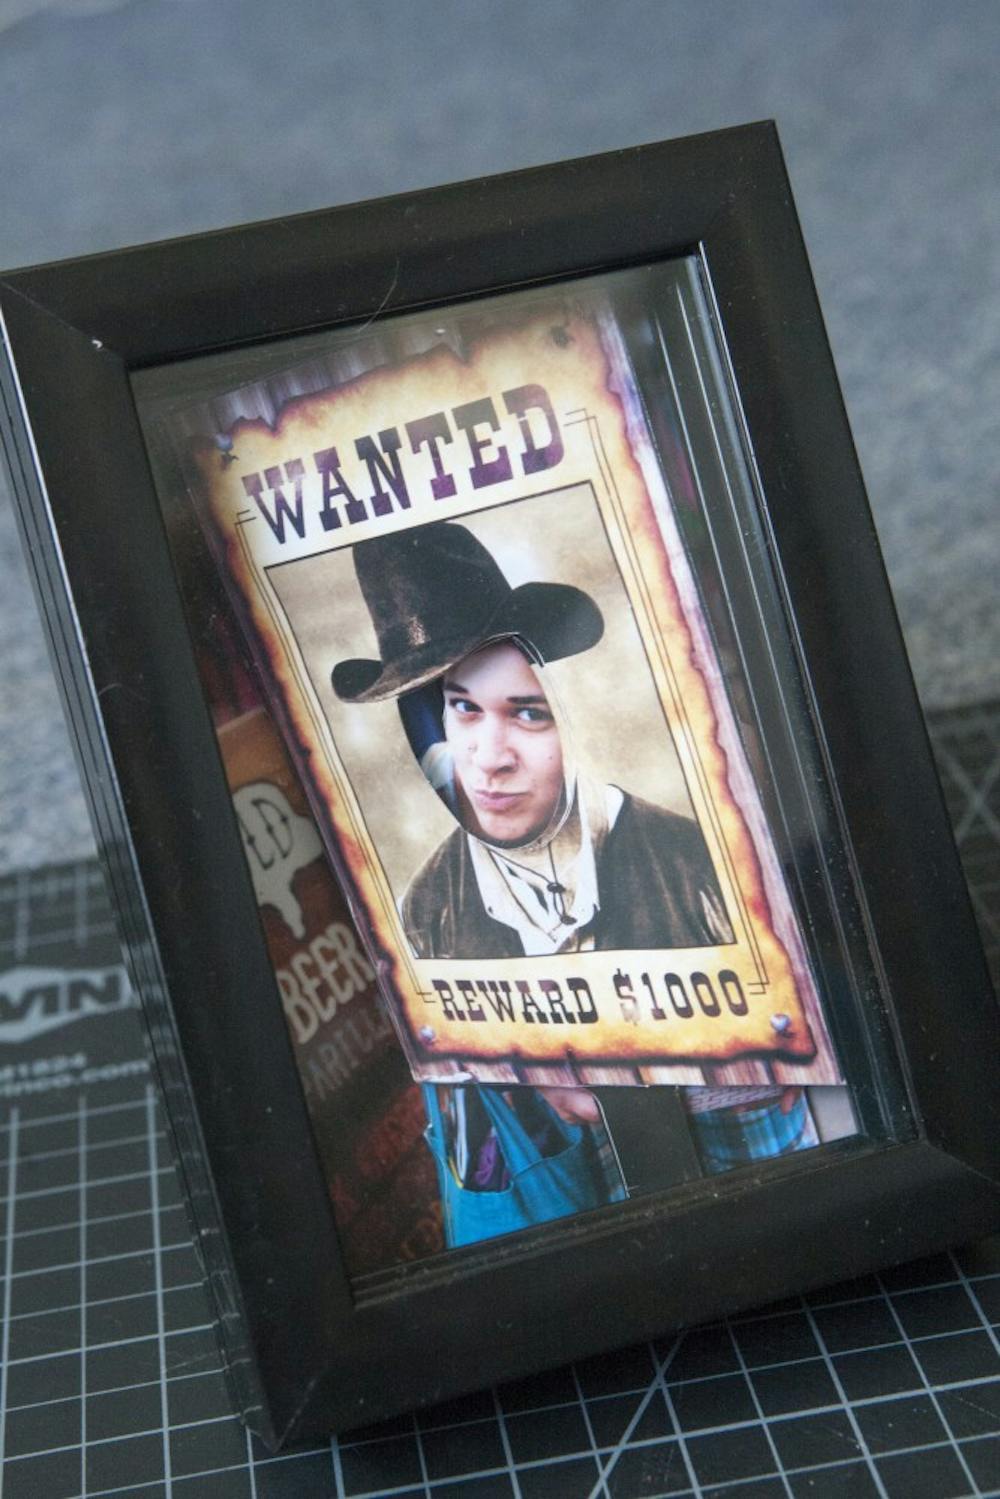
Photos make great gifts, but if you can make something out of a photo, that’s even better. Making 3-D photos with a shadow box is an easy way to make a cheap, personalized gift that the recipient will cherish.
1. When selecting a photo, look for one that will give you layers to cut out. The background is going to be one layer, then your subject another one. Look for other objects in the foreground that can be used to make more layers, like the sign in the photo I used. Print out a copy of the photo and make marks to help see the layers.
 2. Get your frames. Check out the Dollar Tree and look for ones that are square and will stack together to create flush sides. I got three for this project, but I could have gotten away with two. I took out the glass for two of them and the backing from all three.
 3. Use heavy duty craft glue or hot glue to attach the frames together. Make sure the frame with glass is the one on top.
 4. Print out the photos in the size that the frame is. Print out at least as many prints as you will have layers. I always print out a few more just in case I mess up.
 5. Cut your layers. This part is a little tricky. The bottom layer should stay intact. For the second layer, you are going to cut away everything that you want to show — in this photo, the background. In the third layer, cut away everything you want to show from the first and second layer, so the background and the subject. The fourth layer is going to be the top layer, and for me, all that I wanted to show was the face of the sign. When you line them up, they should look something like this step.
 6. Using either foam core or mat board, cut small bits to make spacing between the photo layers. Glue them between the layers. I usually start with the bottom layer, then keep stacking until I get to the top layer. Try to place the spacers all in the same location to give it stability.
 7. Place your stacked photos in your new shadow box. You might need to trim some of the layers to fit into the frame. Attach one of the backings from the frames to the back of your shadow box so that your photo will stay in place. I also used one of the spare pieces of glass behind the photo to give it more stability.

|
|
A 3-D photo sits on a table in a finished shadow box. DN PHOTOS JORDAN HUFFER
|


