As new classes fill students’ schedules, some may also end up filling their trash cans with last semester’s assignments, essays, readings and newspapers to make room in desks and folders. Instead of tossing out these papers, consider these two DIY ideas to transform last semester’s leftovers into useful objects.

Newspaper Gift Bag
What you need:
- Newspaper
- Ruler
- Glue
- Scissors
- Yarn or ribbon
- Cardboard
Directions:
- Take two sheets of newspaper, and stack them on top of each other horizontally. Lay the part of the newspaper you want to be the front of your gift bag face down.
- Glue the two sheets of newspaper together.
- With the right side of the paper, fold 1 inch of it toward the center. Press firmly to crease the fold.
- Fold the left side over so it overlaps 3/4 inch over the folded piece, and glue the overlap together. Press down to crease the left fold.
- Fold the bottom edge of the paper 4 inches up toward the center. Press firmly to crease the fold.
- Separate the bottom fold’s two layers of newspaper, and fold the left corner toward the bottom fold’s center to make a triangle. Repeat with the bottom fold’s right corner.
- Fold the top flap of the bottom section down toward the middle, folding the corners into triangles.
- Repeat with the bottom flap so the two flaps meet. Glue together the two flaps to create the bottom of your gift bag.
- Use scissors to poke two holes 1 inch apart through all layers at the top of your gift bag to create holes for your gift bag’s handles.
10. Gently open your newspaper, and place cardboard inside your gift bag to reinforce its bottom.
11. Cut two pieces of yarn 6 inches long.
12. On one side of your gift bag, thread the ends of your yarn through each hole. Repeat on the bag’s opposite side.
13. Tie three knots at the end of each piece of yarn so your yarn stays attached to your gift bag.
14. If desired, take another sheet of newspaper to create “tissue paper” for your gift bag.
15. Enjoy your recycled newspaper gift bag.

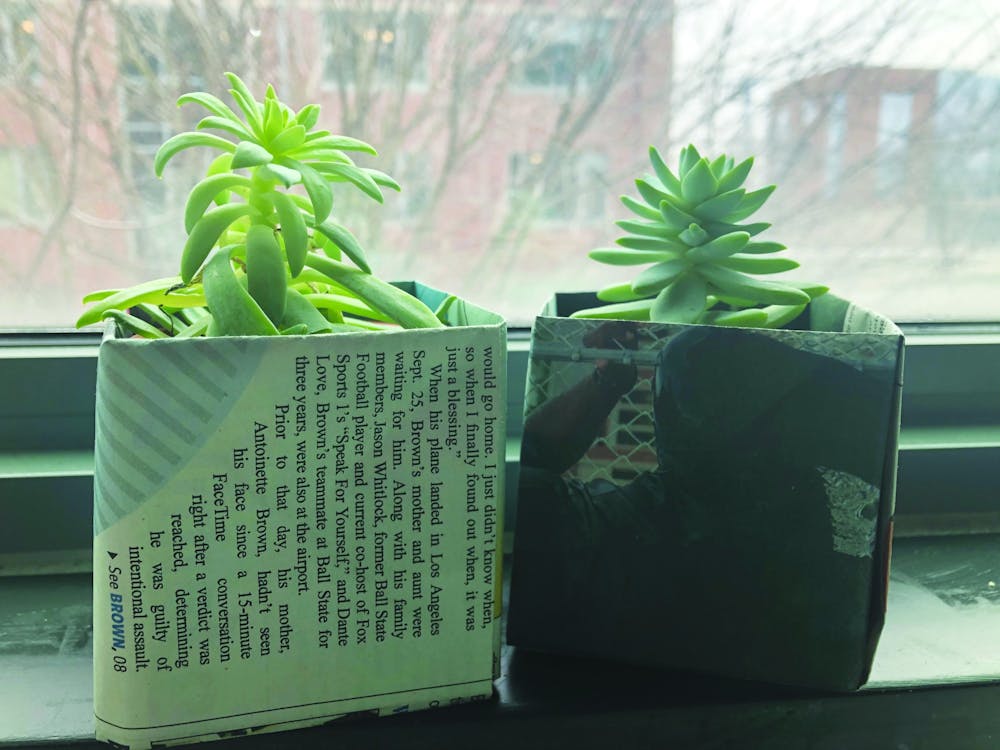
Paper Plant Pot
What you need:
- Newspaper or a sheet of paper
- Soil
- Plant of your choice
Directions:
- Take one sheet of newspaper or one sheet of paper, and fold it in half so the top and bottom meet evenly.
- Fold your paper hot dog style. Press firmly to crease the paper.
- Unfold your paper, and align your paper in front of you so the folded edge is closest to you.
- Fold the bottom left corner of your paper toward the crease in the middle to create a triangle. Repeat with the bottom right corner.
- At the top of your paper, separate one sheet, and fold its edge down to meet the edges of the triangles.
- Taking the fold you just worked with, fold it down once more. Press firmly to crease.
- Flip your paper over.
- Fold the left side of your paper over to meet the center crease. Repeat with the right side of your paper.
- Fold up the bottom edge of your paper to the center of your paper.
10. Taking the fold you just worked with, fold it up once more. Press firmly to crease.
11. Unfold the fold you just made, and tuck its flap inside the pocket of your paper so your paper looks like a rectangle with a triangle on top.
12. Fold the triangle part of your paper over top of the rectangle. Press firmly to crease.
13. Unfold this fold, take the top point of the triangle and fold it toward the triangle’s left corner. Press firmly to crease.
14. Gently open your paper pot.
15. Place soil and plant into your paper pot.
16. Enjoy your paper plant pot.
Contact Nicole Thomas with comments nrthomas3@bsu.edu or on Twitter @nicolerthomas22.
Read More

Road closure between Warwick and Briar road
By Staff Reports / 13 hours agoThere is a road closure on Riverside Avenue between Warwick and Briar roads directly in front of the Cooper Science Building due to a geothermal leak.

Tagayi to Represent France at U19 Tournament Before Joining Ball State
By Staff Reports / YesterdayBefore making her debut in the Mid-American Conference, incoming Ball State women's basketball player Aniss Tagayi will compete for her home country as part of the French national team in the U19 competition.

IPR: Ball State Village hotel project granted tax abatement for 10 years
By Indiana Public Radio / YesterdayThe new hotel being built next to Ball State University in the Village has been given a tax abatement for the next decade. But as IPR’s Stephanie Wiechmann reports, an agreement with the developer means Muncie coffers will see some money from the project in that time.